Showing posts with label Paint Systems. Show all posts

Tuesday, 31 May 2016

Cas d'étude: L’acier prépeint coloré ajoute un élément visuel intéressant à une école de Terre-Neuve-et-Labrador


Projet: Carbonear Academy
Carbonear, Terre-Neuve et Labrador

La Carbonear Academy, qui a la capacité d’accueillir 470 élèves de la maternelle à la 8e année, a ouvert ses portes en septembre 2013. Même si elle venait tout juste d’être construite, un nombre d’élèves supérieur aux attentes a obligé la province à dépenser 2 millions de dollars supplémentaires pour la construction de quatre salles de cours de plus, laquelle a été achevée au début de l’année. Cette école remplace l’école primaire Davis Elementary, vieille de 60 ans.


L’utilisation de l’acier a permis à l’architecte d’ajouter un élément visuel intéressant à l’aide de revêtement mural aux couleurs primaires vives. « Nous avons utilisé de l’acier, car nous étions soumis aux exigences du propriétaire. Les principales préoccupations étaient la durabilité, la résistance aux intempéries et l’entretien minime », déclare l’architecte Greg Snow de Gibbons Snow Architects Inc. « L’acier permet l’utilisation d’une grande variété de profils et de couleurs. Nous avons utilisé des couleurs vives et différentes textures pour ajouter un élément intéressant. »

Son emplacement présentait quelques défis pour l’équipe, dit Snow, « Elle est construite dans le flanc d’une colline. Si nous avions reculé davantage, l’excavation serait devenue très coûteuse », explique-t-il. « C’est un long site très étroit. Nous avons utilisé des blocs de couleur, ce qui crée une rupture dans la façade et lui donne un élément visuel intéressant. Pour certaines sections autour des fenêtres, nous avons utilisé des profils ondulés ordinaires pour créer une rupture dans la façade. »
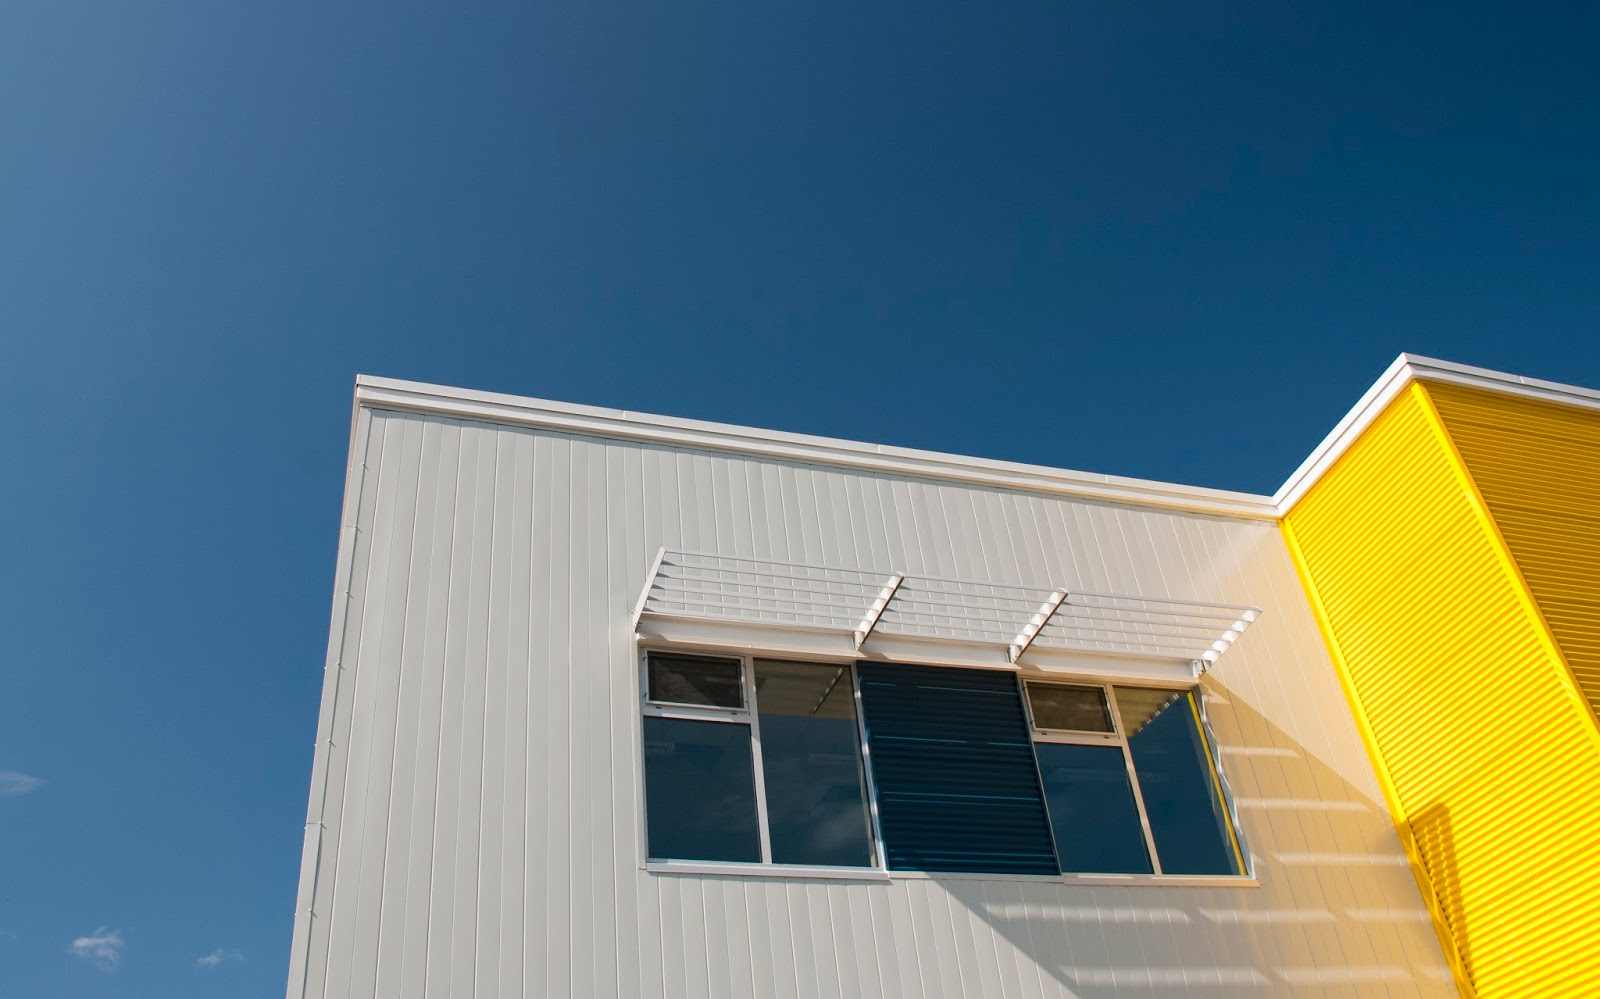

L’école mesure 137 m (450 pieds) de long, renfermant un espace utilisable de 5 110 m2 (55 000 pi ca). Construite à l’aide d’acier de construction et munie de murs en maçonnerie et de revêtements muraux en acier galvanisé prépeint, elle est faite pour durer. « C’est un monument très visible. Il instaure un sens de permanence dans la collectivité », déclare Snow. L’école a été construite selon les normes les plus sévères en matière d’efficacité et d’environnement, et l’architecte a pu tirer profit de certains éléments verts de l’école de façon à engager les élèves et à leur enseigner la réduction de consommation d’énergie. Les personnes qui ont visité le complexe ont été impressionnées par l’extérieur coloré, le stationnement et les voies d’accès habilement conçus, les salles de classe spacieuses et le gymnase d’une certaine ampleur.


« Nous avons incorporé un logiciel interactif lié aux systèmes du bâtiment afin de permettre aux élèves d’observer les systèmes mécaniques et électriques de l’école en temps réel. Ils peuvent constater l’utilisation d’énergie et la comparer à celle d’autres écoles », dit Snow. « Certains professeurs s’intéressent beaucoup à la possibilité de l’utiliser comme outil d’enseignement de la réduction de consommation d’énergie. » Les caractéristiques éco-énergétiques du bâtiment comprennent l’éclairage à haute efficacité muni de capteurs de lumière du jour, ainsi que le chauffage et le refroidissement géothermiques.


Un long panneau d’alliage de couleur jaune a été utilisé pour l’auvent devant le bâtiment afin d’ajouter un élément visuel intéressant supplémentaire et une protection contre les intempéries. À l’intérieur de l’école, la couleur jaune a encore une fois été utilisée pour les escaliers en métal ondulé. « Le hall et l’entrée constituent un véritable point central du bâtiment », déclare Snow. « Nous avons utilisé certaines couleurs personnalisées. »

ÉQUIPE DE CONCEPTION ET DE CONSTRUCTION
ARCHITECTE : Gibbons + Snow Architects Inc.
ENTREPRENEUR GÉNÉRAL : Marco Group
ENTREPRENEUR DE PAREMENT MÉTALLIQUE : Hampton Building Systems Inc.
FOURNISSEUR DE PAREMENT MÉTALLIQUE : Agway Metals Inc. 
ENTREPRENEUR DE CHARPENTES MÉTALLIQUES LÉGÈRES ET DE CLOISONS SÈCHES : CAD Construction
FOURNISSEUR DE CHARPENTES MÉTALLIQUES LÉGÈRES : Imperial Group
PHOTOGRAPHIE : Stephen Sheppard

Cliquez pour télécharger le cas d'étude #85-14: L’acier prépeint coloré ajoute un élément visuel intéressant à une école de Terre-Neuve-et-Labrador


http://www.cssbi.ca

Thursday, 26 May 2016

Project Profile: Colourful prepainted steel adds visual interest to new school in Newfoundland and Labrador

Project: Carbonear Academy
Location: Cabonear, Newfoundland

The Carbonear Academy, which has the capacity for 470 students from Kindergarten to Grade 8, opened for classes in September 2013. Although just completed, a higher than expected number of students forced the Province to spend an additional $2 million on the construction of four additional classrooms which were completed early this year. The school replaces the 60-year-old Davis Elementary School.


Using steel allowed the architect to add visual interest to the school with horizontal cladding in bright primary colours. “We used steel because we were driven by the owner’s requirements. The main concerns were durability, weather-ability and low maintenance,” says architect Greg Snow of Gibbons Snow Architects Inc. “With steel there are a wide variety of profiles and colours you can use. We used bright colours and different textures to add interest.”

The school’s location posed a bit of a challenge for the crew, Snow says, “It is built into the side of a hill. If we had gone back any farther, the excavation would have become very expensive,” he explains. “It’s a very narrow, long site. We used blocks of colour, which breaks up the elevation and gives it a visual interest. For some sections around the windows, we used regular corrugated profiles to break up the elevation.”


The building is 137m (450 ft.) long and has 5,110m2 (55,000 sq. ft.) of useable space inside. Constructed of structural steel, with pre-painted galvanized steel cladding and masonry walls, it was built to last. “It is a very visible landmark and it has a sense of permanence in the community,” says Snow. The school has been built to the highest possible efficiency and environmental standards and the architect was able to take advantage of some of the school’s green elements in a way that will engage students and teach them about energy consumption. Visitors touring the complex were very impressed by the colourful exterior, neatly designed access lanes and parking, the spacious classrooms and sizeable gymnasium.


“We incorporated interactive computer software tied into the building’s systems so students can see the mechanical and electrical systems of the school in real time. They can see the energy usage and compare it to other schools.” Snow says. “Some of the teachers are quite interested in using it as a teaching tool for energy consumption.” The building’s energy conscious features include higher efficiency lights with daylight sensors and geo-exchange heating and cooling.


A long yellow composite panel was used for the canopy in front of the building to add further visual interest and some weather protection. Inside the school, the yellow colour was again used for the corrugated metal stairs. “The lobby and entrance area are a real focal point for the building,” says Snow. “We used some custom colours.”

DESIGN AND CONSTRUCTION TEAM 
ARCHITECT: Gibbons + Snow Architects Inc. 
GENERAL CONTRACTOR: Marco Group 
STEEL SIDING CONTRACTOR: Hampton Building Systems Inc. 
STEEL SIDING SUPPLER: Agway Metals Inc. 
LIGHT STEEL FRAMING/ DRYWALL CONTRACTOR: CAD Construction 
LIGHT STEEL FRAMING SUPPLIER: Imperial Manufacturing Group 
PHOTOGRAPHY: Stephen Sheppard


http://www.cssbi.ca

Thursday, 3 March 2016

Prepainted Steel Cladding and Light Steel Framing Combat Harsh Conditions

Project Profile: Jonah Amitnaag School and Community Centre
Baker Lake, Nunavut

The geographic centre of Canada, Baker Lake, is the only inland Inuit community in Canada, with access by water to Hudson Bay through Chester eld Inlet. The concept for the new 4,580m2 (49,300 sq. ft) school, occupied since August 2004, ‘Broad Horizons’, relates to the school’s location adjacent to Baker Lake, as well as the ideals of the educational process.
The gentle arching plan of the school takes advantage of the school’s location central to the community overlooking Baker Lake. A central triangular shaped atrium punctuated by a central stair and bridge, expands outward toward the lake in both plan and section.The school is designed to function both as a school and as a community library. After hours both the library and gymnasium can be accessed directly from the entrance vestibule without entering the rest of the building. The foundation is built on141mm (5-1/2”) diameter rock socketed piles elevating the school over a sloped site and allowing the community area snow melt to drain below. Access is provided by a series of galvanized steel stairs and ramps.
Good Building Practice Guidelines
The Nunavut Government has prepared guidelines for good building practice for northern facilities to assist designers with reducing problems and eliminating past mistakes. Building overhangs are discouraged and special attention is encouraged regarding mechanical air intakes and exhausts regarding ice build-up and infiltration of fine blowing snow. The new school reflects these guidelines.
Massing is straight forward without overhangs. The envelope design is simple, sheathing to the walls, soffit and roof is covered in a continuous air-vapour barrier with semi-rigid non-combustible insulation and prefinished steel on girts and clips on top. Outside field painting to wood or metal does not last in this dry harsh climate. To reduce maintenance and achieve a long-lasting finish, Architects Smith Carter of Winnipeg selected prefinished steel for exterior walls, soffit and roof and galvanized steel for exterior ramps, handrails and canopy extensions.
Elevations are enlivened by a variety of prefinished steel profiles, colours and finishes. The majority of the facade is clad in 7/8” corrugated Z275 galvanized steel panels in 0.66mm and 0.81mm (0.026” and 0.032”) HMP Series Regent Grey QC6082, 0.81mm (0.032”) 10000 Series, Twilight Blue QC3644 and 0.81mm (0.032”) Metallic Series Bright Silver QC2624. Flat prefinished steel panels are also used to provide a contrasting texture at window areas. Primrose Yellow QC3729 is used between windows, with Silver.


http://www.cssbi.ca

Tuesday, 15 December 2015

Le marbrage de la tôle d’acier prépeinte


Le marbrage, aussi appelé tachage de pression ou imprégnation, désigne un motif brillant irrégulier ou inégal sur la surface d’une tôle d’acier prépeinte. La photographie de la figure 1 illustre à quoi ressemble le marbrage. L’aspect marbré se forme lorsque les composants brillants présents dans la dernière couche prépeinte sont compressés ou aplatis lors de la fabrication et du procédé d’enroulement. Cet aspect est encore plus évident dans les teintes foncées et les produits brillants. On remarque aussi habituellement le marbrage au centre de la bande où le produit enroulé subit le plus de pression. 

Le marbrage se dissipera naturellement une fois la feuille déroulée et exposée à la température ambiante. L’aspect lustré naturel reviendra plus rapidement si la tôle peinte est exposée à la chaleur. Généralement, l’exposition au soleil est suffisante pour éliminer le marquage. La chaleur assouplira la surface de peinture aplatie et ramènera l’aspect lustré uniforme d’origine. Dans les cas les plus problématiques, le revêtement se rétablira naturellement une fois que la pression subie à l’intérieur de la bobine aura été supprimée et que le matériel aura été exposé au soleil pendant quelques heures à quelques jours. 

Les mesures suivantes peuvent être prises pour minimiser la gravité et la fréquence du marbrage 
  • Sélectionnez une peinture d’apprêt qui possède le même degré de brillance et de dureté que la couche de peinture supérieure 
  • Dans la mesure du possible, entreposez les bobines en position verticale 
Le marbrage est une réalité, mais il n’arrive qu’en de rares occasions qu’il soit permanent et ne puisse se dissiper dans des conditions normales. Une petite partie peut être chauffée au moyen d’un séchoir à cheveux ou d’eau chaude pour accélérer le processus et confirmer que le lot reprendra son lustre initial éventuellement. Le marbrage n’affecte que l’aspect esthétique et n’affectera pas les propriétés de résistance au vieillissement naturel du produit.

Cliquez pour télécharger Quelques mots sur la tôle d'acier #46: Le marbrage de la tôle d’acier prépeinte

http://www.cssbi.ca

Thursday, 10 December 2015

Pressure Marking of Prepainted Sheet Steel


Pressure marking, also known as pressure mottling or imprinting, is an uneven or irregular gloss pattern on the face of a prepainted sheet steel. The photograph in Figure 1 shows what pressure marking looks like. The mottled appearance takes place when the gloss components in the prepainted top coat are compressed or flattened during the manufacturing and coiling process. The condition is more prevalent on dark colours and high gloss products. Pressure marking is also typically noted in the centre of the strip where the coiled product is under the most pressure.

The marking will dissipate naturally once the sheet has been un-coiled and left exposed to the ambient temperature. The natural gloss appearance will return faster if the painted sheet is subjected to heat. Typically exposure to sunlight is sufficient to remove the mottling. The heat will release the flattened paint surface and return the gloss to its original uniform appearance. In all but the most severe cases the coating will recover naturally once the pressure of being in a coil has been removed and the material exposed to the sun for a couple of hours to a few days. 

The following steps can be taken to minimize the severity and occurrence of pressure marking 
  • Select a back coat that has a similar gloss level and hardness to the top coat
  • Where possible store coils in a vertical position 
Pressure marking does happen, but only in very rare cases would it be permanent and not dissipate under standard conditions. A small section can be heated using a hair dryer or hot water to accelerate the process and confirm that the lot will return to its original gloss given time. Pressure marking is a cosmetic condition and will not affect the weathering performance of the product.


http://www.cssbi.ca

Thursday, 17 September 2015

Project Profile: Sault College Academic Building

Eye-catching Resourceful and Innovative Design

Sault College Academic Building - Sault Ste. Marie, Ontario


DESIGN AND CONSTRUCTION TEAM 
Architect: Tillmann Ruth Robinson with EPOH Inc. Architects and Consulting Engineers 
General Contractor: Ellis Don 
Steel Cladding Supplier: Agway Metals Inc. 
Light Steel Framing (girts and channels) Supplier & Installer: Flynn Canada 
Photography: Shai Gil Photography

Taking their cue from the breath-taking local landscape, the team at Tillmann Ruth Robinson Architects gave a much-needed facelift to Sault Ste. Marie College. The new 6,968m2 (75,000 sq. ft.) $21M academic building was designed to blend the new with the old. The new building includes a spacious front entry and exhibit space, plus flexible classrooms for aviation. A 743m2 (8,000 sq. ft.) interactive learning commons was added to provide the students with casual space to interact.


“This was the first time the college had a new building added to it in many years. It is an important gateway building for the college itself. We situated the building at the front entry. We wanted the design to reflect the college, as well as the community of Sault Ste. Marie, and its location”, explains Scott Robinson, Director of Design for Tillmann Ruth Robinson. “It is a blend of contemporary and natural materials. Along with the steel cladding we used natural stone and wood to reflect the surrounding geographical area.”

“Kids are hanging out in the common area. They now have a place to meet and socialize after class. It has a big impact on how students feel about the college, which is rewarding,” Robinson says. “The new area provides some non-academic social spaces that aren’t quite as formal as libraries. When people say they feel good about being there, that inspires us.” 

The Tillmann Ruth Robinson team faced a number of obstacles – but successfully completed the project in fourteen months to finish by March 2011. “The challenges we had were a tight budget as well as a tight timeframe. We had an aggressive construction schedule,” Robinson says. “We will take the architectural vocabulary we created here and use it on additional buildings on the campus.” 


“Not only does the new building provide great curb appeal, it is truly distinguishable as a Northern Ontario College,” states Dr. Ron Common, President, Sault College, “Sustainable design elements have been included in the planning of this complex that incorporates a local flavour such as indigenous plants, wood roofing, steel cladding and copper, the latter having historical significance to First Nations people, who account for 20% of Sault College students.” 

For the modern look of the building, Robinson and his team favoured steel, which was both costeffective and flexible enough to allow for innovative design. “Using steel allowed us to customize the panels and siding for a fresh modern look. It complemented the natural materials of stone and wood,” he says. “The more-modern materials reflect the forward-thinking vision of the school.” The preformed, prefinished steel cladding is 0.76mm (.0299”) Z275 (G90) galvanized with the 10000 Series paint system.


PREPAINTED STEEL CLADDING TYPES: 
     PMC-1: Agway HF-IINF, colour: QC3659 Grey Berry
     PMC-2: Agway HF-15NF, colour: QC3661 Pebble
     PMC-3: Agway 7-175, colour: QC3661 Pebble Material is .76mm (.0299”) prepainted Z275 
                   (G90) galvanized ASTM A653/653M Grade A
LIGHT STEEL FRAMING: 
Steel subgirts (“Z” bars, angles and channels) were manufactured from Z275 (G90) galvanized sheet steel in accordance with requirements of ASTM A653M Grade A, Structural Steel Quality Grade 22 (230).

http://www.cssbi.ca

Tuesday, 9 June 2015

Fixation de toiture et parement en tôle d’acier prépeinte

Introduction 
Les toitures et les parements (revêtements) en tôle d’acier sont offerts dans une grande variété de profils, de couleurs et de systèmes de peinture. Les systèmes prépeints modernes utilisés sur des produits canadiens fourniront des décennies de bon rendement avant de montrer des signes visibles de détérioration de la surface peinte. Cependant, un composant important du système de parement, c’est l’attache utilisée pour le fixer sur la structure. Cette attache n’est pas seulement une vis; elle fait partie de l’assemblage du toit ou du mur et on doit s’attendre à ce qu’elle fournisse le même rendement à long terme. Ce rendement n’est pas simplement la capacité de garder le parement de façon sécuritaire en place, mais il doit également correspondre à la couleur et la durabilité de la peinture. 

La sélection de la vis appropriée au travail est la première étape de la création d’un système de parement qui fournira un rendement à long terme. L’étape suivante, c’est l’installation. L’installation de vis dans un parement en tôle d’acier est chose courante et peut être fait très de manière efficiente. Les fabricants d’outils ont développé une vaste gamme d’options pour les attaches d’installation dans n’importe quel type d’infrastructure. Le choix de l’outil le plus approprié aidera lors du processus d’installation. Malheureusement, il est possible d’endommager la peinture sur la vis lors de l’installation, comme montré dans la photo ci-dessous. 


Effet du type d’outil d’installation sur une tête de vis 
Un projet de recherche a été mené pour l’ICTAB pour étudier le rendement d’outils d’utilité courante utilisés pour installer des vis qui retiennent un parement sur une ossature en bois. L’objectif était d’évaluer l’outil privilégié pour tenir la tête de la vis peinte durant l’installation. L’étude ne portait pas sur l’évaluation de différents finis (p. ex., peinture en poudre, peinture fraîche ou peinture organique) ni sur l’évaluation de différentes marques d’outils. L’étude a porté seulement sur l’effet que les différents mécanismes d’outil (p. ex., rotation, percussion, chocs ou combinaison) avaient sur la vis durant le processus d’installation. 

Cinq types d’outils ont été testés : 
  1. Tournevis électrique avec mandrin à profondeur réglable 
  2. Perceuse à percussion à batterie 
  3. Tournevis à batterie avec commande du couple réglable 
  4. Tournevis/perceuse électrique 
  5. Tournevis à chocs à batterie
Les tests suivants ont été effectués :
  1. Maîtrise (vitesse) d’installation des outils 
  2. Choc (dommage) à cause des outils sur la protection contre la rouille - Accéléré 
  3. Choc (dommage) à cause des outils sur la protection contre la rouille - Normal 
  4. Protection contre la rouille des vis jamais installée 
Le problème en réalité consiste à trouver le bon équilibre entre le dommage potentiel causé à la tête de la vis peinte et la vitesse d’installation. L’évaluation des données du test était fondé sur une pondération 70/30 de la réduction des dommages et du temps d’installation respectivement. À l’aide de ce critère de sélection, les premiers choix ont été le tournevis électrique avec mandrin à profondeur réglable et le tournevis/la perceuse électrique. Les pires choix ont été la perceuse à choc et le tournevis à choc. 

Quels que soient les critères d’évaluation, le tournevis à chocs était toujours nettement le pire. Les forces de choc agissant sur la tête de la vis endommageront la surface de la vis et causeront une corrosion précoce. Même si les tests ont été réalisés sur des têtes de vis peintes, les mêmes conclusions s’appliquent également aux vis à tête non peinte et en nylon. 

Outils recommandés et méthodes d’installation 
Tournevis 
Les attaches pour toiture et parement en tôle d’acier prépeinte doivent avoir une tête de forme hexagonale. L’outil d’installation comprend un tournevis adapté au format et à la forme de la tête de vis. Souvent, ce tournevis comprend un aimant encastré pour retenir la vis en place durant l’installation. Le fait de passer la vis au travers de la tôle d’acier rejettera les limailles d’acier qui peuvent s’accumuler sur l’aimant du tournevis. Ces limailles doivent être enlevées régulièrement afin que la tête de la vis s’emboîte fermement dans la douille du tournevis. Les tournevis s’usent rapidement et doivent être remplacés après avoir vissé 5000 vis. 

Vitesse de pistolet à vis
Que vous utilisiez une vis autoperceuse ou une vis autotaraudeuse, la vitesse (tr/min) du pistolet à vis est importante. Des vitesses plus basses de pistolet à vis amélioreront le rendement du perçage en réduisant la chaleur générée durant le processus de perçage. Pour fixer du parement en tôle d’acier dans des conditions de métal sur métal ou de métal sur bois avec des vis en acier au carbone, la vitesse maximale recommandée est de 2500 tr/min, Des vitesses plus basses peuvent être souhaitables pour percer dans des éléments plus épais ou avec des vis en acier inoxydable. Le fabricant des vis devrait être consulté. 

Serrage des attaches 
Les attaches exposées pour les systèmes de parement en tôle d’acier comprennent une rondelle sous la tête de la vis pour former un joint étanche. Il est très important que les attaches soient serrées adéquatement afin d’obtenir une étanchéité optimale. Assurez-vous que la rondelle soit comprimée, mais pas jusqu’au point où elle ressortira des côtés de la tête de la vis. Le fabricant des vis devrait être consulté. 


Conclusion 
Les installateurs de parement en tôle d’acier doivent examiner leur choix de pistolet à vis et l’effet qu’il peut avoir sur le rendement à long terme du revêtement de la tête de la vis. L’objectif, c’est de créer un assemblage de toiture et de mur durable, et ceci comprend les attaches. Contribuez à maintenir la qualité des attaches en utilisant un tournevis/une perceuse et non pas un outil qui met la vis en place par des chocs. Soyez également conscient de la vitesse d’installation et de la compression appropriée de la rondelle.

Friday, 5 June 2015

Fastening Prepainted Sheet Steel Roofing and Siding

Introduction
Sheet steel roofing and siding (cladding) is available in a wide variety of profiles, colours and paint systems. The modern prepainted systems used on Canadian-made products will provide decades of beautiful performance before there are any visible signs of deterioration of the paint surface. However, an important component of the cladding system is the fastener used to attach it to the structure. This fastener is not simply a screw; it is part of the roof or wall assembly and should be expected to provide the same long-term performance. This performance is not simply the capacity to safely hold the cladding in place, but also to match the colour and durability of the paint system.

The selection of the correct screw for the job is the first step in the creation of a cladding system that will provide long-term performance. The next step is the installation. Installing screws in sheet steel cladding is commonplace and can be done very efficiently. The tool manufacturers have developed a wide range of options for installing fasteners into any type of substrate. Selecting the most appropriate tool will help the installation process. Unfortunately it is possible to damage the paint coating on the screw during installation, as shown in the photo below.


Effect of Installation Tool Type on Screw Head
A research project was carried out for the CSSBI to investigate the performance of commonly available tools used to install screws attaching sheet steel cladding to a wood frame. The objective was to assess the preferred tool for maintaining the painted screw head during installation. This study was neither an assessment of different finishes (i.e. powder paint, wet paint or organic paint) nor an assessment of different tool brands. This study only looked at the effect the different tool mechanisms (i.e. rotation, hammer, impact or a combination) had on the screw during the installation process.

Five types of tools were tested:
  1. Electrical screw driver with depth adjustable nosepiece 
  2. Battery driven hammer drill 
  3. Battery driven screw driver with adjustable torque control 
  4. Electrical screw drill/driver 
  5. Battery driven impact driver 
The following tests were performed:
  1. Installation proficiency (speed) of tools 
  2. Impact (damage) by tools on rust protection – Accelerated 
  3. Impact (damage) by tools on rust protection – Normal 
  4. Rust protection of screws never installed 
The real-life problem is to find the right balance between the potential damage inflicted on the painted screw head and the installation speed. The evaluation of the test data was based on a 70/30 weighting of minimizing damage and reducing installation time respectively. Using this selection criterion the first choices were the electrical screw driver with depth adjustable nose piece and the electrical screw drill/driver. The poorest choices were the hammer drill and impact driver.

No matter the evaluation criteria, the impact driver was always significantly the worst performer. The impact forces acting on the screw head will damage the screw surface and lead to early corrosion. While the tests were done on painted screw heads, the same conclusions would apply to unpainted and nylon head screws as well.

Recommended Tools and Installation Methods
Drivers
Fasteners for prepainted sheet steel roofing and siding will have a hexagonal shaped head. The installation tool incorporates a driver that matches the size and shape of the screw head. Often these drivers include a recessed magnet to hold the screw in place during installation. The act of driving the screw through the sheet steel will release steel filings that can accumulate on the driver magnet. These filings need to be removed on a regular basis so that screw head fits snugly into the driver socket. Drivers will also wear out with use and should be replaced after driving 5,000 screws.


Screw Gun Speed
Whether using a self-drilling or self-tapping screw, the screw gun speed (RPM) is important. Slower screw gun speeds will improve the drilling performance by reducing the heat that is generated during the drilling process. For fastening sheet steel cladding in metal-to-metal or metal to-wood conditions with carbon steel screws the maximum RPM recommended is 2500. Slower speeds may be advisable for drilling into thicker steel members or with stainless steel screws. The screw manufacturer should be consulted.

Tightening the Fastener
Exposed fasteners for sheet steel cladding systems will include a washer under the head to make a water-tight seal. It is important that the fasteners be tightened correctly to obtain the optimum seal. Make sure the washer is compressed, but not so much that it is squeezed out the sides of the screw head. The screw manufacturer should be consulted.


Conclusion
The installers of sheet steel cladding need to consider their choice of screw gun and the effect it can have on the long-term performance of the screw head coating. The objective is to create a long-lasting roof or wall assembly, and this includes the fasteners. Help maintain the integrity of the fasteners by using a screw drill/driver and not a tool that drives the screw by impacting it. Also be cognizant of the best installation speed and properly compressing the washer.


http://www.cssbi.ca

Tuesday, 19 May 2015

Nouveau système de peinture - Série Perspectra PlusMC


Série Perspectra PlusMC
La série Perspectra PlusMC est la prochaine génération de notre système de peintures de la série Perspectra®. La série Perspectra PlusMC résiste maintenant davantage au farinage, à la dégradation des couleurs et chimique, et aux égratignures. Elle fait appel à une technologie de polyester modifié au silicone PMS à la fine pointe et une nouvelle base de résine qui assure une tenue améliorée aux utilisateurs finaux. Cela se traduit par une résistance supérieure à la dégradation des couleurs causée par l’usure, une meilleure rétention de la brillance et une résistance maximale aux égratignures. Les caractéristiques de qualité et de tenue offrent une intégrité du film de 40 ans et des valeurs de résistance à la dégradation des couleurs et au farinage de 30 ans pour des applications du bâtiment, comme les toitures et les parements, partout au Canada et dans la région continentale des États-Unis. La série Perspectra PlusMC peut être appliquée sur l’acier galvanisé à chaud ou sur l’acier GalvalumeMC à résistance accrue à la corrosion (revêtement d’un alliage à 55 % aluminium et 45 % zinc).

Caractéristiques de qualité et de tenue améliorées
La série Perspectra PlusMC a été développée pour offrir une résistance de 30 ans à la dégradation des couleurs pour des applications non verticales sur les bâtiments. Elle offre également une exceptionnelle intégrité du film de 40 ans, des valeurs de résistance au farinage de 30 ans et une excellente rétention de la brillance, ce qui en fait le choix idéal pour les murs et les revêtements extérieurs. La série Perspectra PlusMC est toujours le produit prépeint de premier choix pour un large éventail d’applications dans les systèmes de construction en acier (bâtiments préfabriqués), les panneaux architecturaux, les projets commerciaux, institutionnels et industriels, et les bâtiments agricoles.

Le procédé de fabrication de la série Perspectra PlusMC commence par notre acier galvanisé à chaud de qualité supérieure ou Galvalume, fabriqués selon des normes strictes et répondant aux exigences de qualité ASTM A653/ A653M ou A792/A792M. L’acier revêtu en bobines passe ensuite dans les lignes d’enduction en continu modernes où il est soigneusement enduit d’un système de peintures cuit en usine selon les spécifications des fabricants de peintures. Le produit final est soumis à des essais conformément aux normes strictes établies par la National Coil Coating Association (NCCA) et l’American Society for Testing and Materials (ASTM). Des caractéristiques de qualité et de tenue ont été définies pour les couleurs standards de la série Perspectra PlusMC et elles s’appliquent partout au Canada et dans la partie continentale des États-Unis.

Système de peintures de la série Perspectra PlusMC
La figure 1 illustre la composition du système de peintures de la série Perspectra PlusMC. La couche de finition colorée est appliquée sur une couche d’apprêt flexible à rendement supérieur recouvrant le prétraitement chimique qui améliore la résistance à la corrosion, plus particulièrement aux bords coupés, aux éraflures, de même qu’aux courbures.


Le prétraitement chimique est appliqué sur le revêtement métallique – une tôle d’acier galvanisé à chaud ou une tôle Galvalume avec son revêtement en alliage à 55 % aluminium-zinc très résistant à la corrosion – afin de favoriser l’adhérence de l’apprêt sur le revêtement métallique.

La face non apparente de la tôle est prétraitée et revêtue d’une couche primaire de protection afin d’améliorer la résistance à la corrosion et de minimiser les avaries par frottement.


http://www.cssbi.ca

Thursday, 14 May 2015

New Paint System - Perspectra Plus Series™


Perspectra Plus Series™
Perspectra Plus Series™ is the next generation in our Perspectra Series® paint system. Perspectra Plus Series™ is now even more resistant to chalk, fade, chemical degradation and scratching. It uses state of the art Silicone Modified Polyester (SMP) technology and a new resin backbone which provides enhanced performance to end-users. The proven benefits include superior colour fade resistance to weathering, improved gloss retention and maximum hardness against scratching. The Quality and Performance specification offers 40 years of film integrity and 30 years of stringent colour fade and chalk values for building industry applications like roofing and cladding across Canada and the continental US. Perspectra Plus Series™ is available on hot dip galvanized and on highly corrosion resistant Galvalume™ (55% Aluminum – 45% Zinc alloy coating).

Upgraded Quality and Performance Specification
Perspectra Plus Series™ was developed to deliver enhanced 30-year paint colour fade performance for non-vertical installations in building applications. It remains ideal for walls and cladding applications with outstanding 40-year paint film integrity, 30-year paint chalking resistance and excellent gloss retention. Perspectra Plus Series™ is still the preferred prepainted material for a wide range of applications for steel building systems (pre-engineered buildings), architectural panels, commercial, institutional, industrial projects and agricultural buildings. The manufacture of Perspectra Plus Series™ begins with high quality hot dip galvanized or Galvalume, made to rigid specifications and quality tested to meet the requirements of ASTM A653/A653M or A792/A792M. The coated steel is then painted on our modern continuous coil coating lines that carefully apply and factory-bake the paint system to the paint manufacturers’ specifications. The final product is tested in accordance with stringent standards established by the National Coil Coating Association (NCCA) and American Society for Testing and Materials (ASTM). A Quality & Performance specification has been developed for Perspectra Plus Series™ standard colours applicable to anywhere in Canada or the continental United States.

Perspectra Plus Series™ Paint System
A schematic of the Perspectra Plus Series™ is shown in Figure 1. The colourful topcoat paint system is applied on the long proven flexible primer which enhances corrosion resistance, particularly at cut edges, scratches and bends, and covers the chemical pretreatment.


The chemical pretreatment is applied to promote adhesion between the primer and the metallic coating, which can be either Galvalume sheet with its highly corrosion resistant 55% aluminum-zinc alloy coating, or hot dip galvanized.

The unexposed side is typically pretreated and coated with a wash coat or backer coat to enhance the corrosion resistance and minimize abrasion damage.

http://www.cssbi.ca